I was looking at my Tomato Cage Marbleized Side Table the other day and trying to think of other ways to use tomato cages unconventionally. Before creating my side table, I created a Plant Stand using a tomato cage. It dawned on me that if I cut the cage down to the second rung, it would be the perfect height for a foot stool!
I’ve always wanted to make a foot stool. I’m beyond pleased with how it turned out. It looks so great next to the side table! Maybe I should start a line of tomato cage furniture? HA! I upholstered the foot stool with an inexpensive rag rug. I’ve been inspired by other DIY’ers use of rag rugs recently and wanted to give it a go myself. The colors are just perfect!
Share On Facebook
Share On Twitter
Share On Pinterest
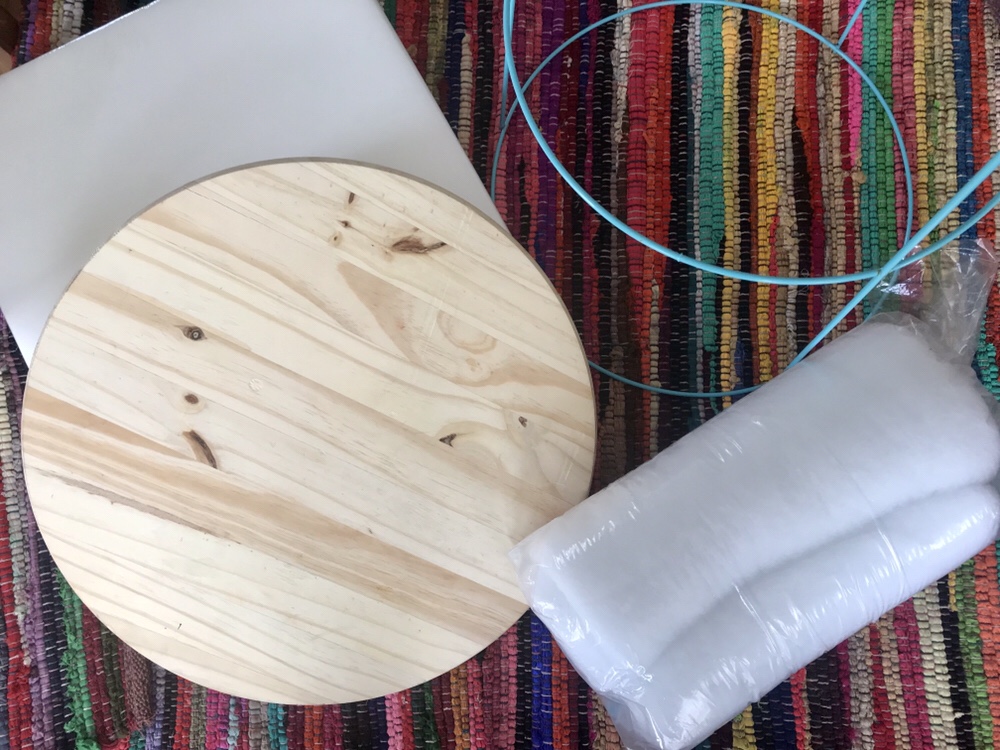
I bought the rag rug, foam craft cushion (4 pack- 16″ x 16″ x 1″) and quilt batting (45″x 60″) for this project at Walmart. The colored tomato cage and precut wood round (1″ x 17-3/4″) came from Home Depot. I also used a wire cutter, spray adhesive, scissors, a piece of black felt, a sharpie, a serrated knife, a cutting mat, a drill, six screws, polypropylene hanger strip (3/4″ x 10′) and a staple gun for this project.
Using a pair of wire cutters, cut the tomato cage down to the second rung from what would have been the top of the cage. Get a good pair of wire cutters. The ones pictured here created a bit of a struggle. I used them for the other tomato cage projects as well and they did the trick again this time, but save yourself the hassle.
Ta-da. It kind of reminds me of one of those platforms elephants stand on! Maybe, thats another project. Speaking of standing, I don’t recommend standing or sitting on your finished foot stool. However, I do recommend putting your feet up!
So, I bought my foam cushion before I picked up my wood round. This created a bit of extra cutting, but ultimately was fine in the end. The foam cushion I used came in a four pack and was slightly smaller than my wood round. I stacked two of the 1″ foam cushions on top of each other for my foot stool. Try to find foam that is slightly larger than the round, that way all you’ll need to do is cut out a circle or two.
Using a sharpie, trace around the wood round onto the foam piece(s).
To complete my circle, I had to use an additional piece from my pack.
I made my cuts using a serrated knife. Hold it at a 90 degree angle and cut half way through at first and then go back over the cut until all the way through the foam.
Use spray adhesive to adhere foam pieces to wood round and to one another. To recap, two 1″ circular pieces of foam are stacked on top of the wood round.
Next, cover with quilt batting.
Staple the batting to the bottom and cut off any excess.
To cover the foot stool, I positioned it upside down on my rag rug close to one end. Pull up the end and staple in the center to the bottom of the round. Next pull up the sides and staple them to the center.
Pull up the other side, cut off excess, then staple in the center.
Continue creating “new centers” and stapling your way around until taught. Try to get the bottom as flat as possible.
Cut off rag rug excess.
I covered the bottom ugliness with a piece of black scrap felt. I used spray adhesive to adhere it. This step is totally unnecessary, most likely no one will see the bottom of your footstool, but it helps me sleep at night.
Finally, I centered my tomato cage on the underside of the foot stool and attached it in three spots with the hanger strap and screws.
I really like this idea. What a darling little foot stool. I enjoy putting my feet up, and this little tuffet ( as my granddaughter calls them. LOL) will suit my needs just fine. I love your creative ideas. Can’t wait to see what you come up with next.


10 Comments
That’s really cool!!!
love it! can’t wait to see what you do next.
What a fun project! So very clever. As an aside – love your socks! Fun socks make the world go around.
Love this project! and your socks, too!
I really like this idea. What a darling little foot stool. I enjoy putting my feet up, and this little tuffet ( as my granddaughter calls them. LOL) will suit my needs just fine. I love your creative ideas. Can’t wait to see what you come up with next.